Crazy day today, I spent some time organising myself to make my pin cushion....But I got myself side tracked (which is not hard for me to do) and sewed up some stuff for a school project. Then because I was too early for the school pick up I found myself parked on a hill in the car playing games...
All was wonderful and peaceful with my me time until I started bumping about..... It's strange how your brain takes a while to register what is happening, you know that feeling but it takes a few seconds to realize it's an earthquake. This is the biggest shock we have had for awhile as it's been quiet here until recently. This is the first time I've experienced an earthquake in the car parked on a hill...weird feeling.
Tomorrow seriously I am going to get stuck in to making my pin cushion I have the day to myself so I can sew...
Another Fabric Flower
The process for making this fabric flower is mostly the same as my instructions for the Flower Power Tutorial. The only difference is (not counting the fabric) it is just a lesser number of petals and also a different shaped petal. You get this by folding the circle in half not quarters....
 |
| The flower ended up on a pin cushion in the end..... |
 |
| Whoops one petal is bigger than the other.! This is a 6 petal flower made the same way as the one above....This one ended up on a pin cushion too.... |
A Parcel in The Letterbox
I won one of the prizes over at Hopeful Threads when participating in their Dress a Girl campaign. It was a really nice surprise....
 |
| Wow this is so fantastic....a big thanks to everyone involved with this! Such lovely materials and so colourful...Luv them very much! |
Flower Power
Today I've been lost in the process of making a fabric flower.....I am blind to the mess I have created and all the dishes piled up waiting to go into the dishwasher. Now I'm blogging amongst my mess and mayhem...
Making A Fabric Flower:
You will need: Small scraps of fabric, Strong thread, Needle, Scissors, Pen, Iron, Buttons, A compass or a round dish, Fabric glue plus a Glue gun
Size: 10cm circle for flower
Fabric used: Cotton 100% fabric
Making A Fabric Flower:
You will need: Small scraps of fabric, Strong thread, Needle, Scissors, Pen, Iron, Buttons, A compass or a round dish, Fabric glue plus a Glue gun
Size: 10cm circle for flower
Fabric used: Cotton 100% fabric
 |
| Cut out five circles and press the fabric with an iron... |
 |
| Fold the fabric circles in half and press again |
 |
| Fold the fabric halves into quarters and press. You can now sort out the order you want your petals in be into form your flower..... |
 |
| Trace with a pen around a cotton reel onto the felt to make a small circle. Cut the felt circle out with pinking scissors... |
 |
| Glue the felt circle to the back of the flower with fabric glue... |
 |
| Now chose your button for the centre..... Which button will I chose? |
 |
| I like this one....but sonehow I changed my mind! |
 |
| I chose a blue button in the end...Glue your button in place onto the front of the flower...You can use a glue gun here if you want. Now your flower is finished all ready to use! |
Time To Tidy-Up
Before I can even think about making my pin cushion for the Pin Cushion Swap...... I have to clean up my stash. What a mess I think I lost 2 days to folding all the fabric!
 |
| This is just a little bit....there is still a big tub and a little box of quilting fabric. Why do I do this? It used to be packed perfectly.... |
 |
| I sorted out some buttons I thought I might need. To only have them all put back in the button jar by someone...because little children were visiting |
 |
| This is better and I'll maybe chose something here for the pin cushion swap! |
Making A Hatoto Cloth Bag
The bag pattern I used for my bag was the Hatoto Bag pattern from Yoshimi The Flying Squirrel. Here are my efforts, the fabric I used was a curtain fabric for the outside, and a patterned cotton for the inside (All from my stash). I haven't given any instructions as there were none with a the PDF that I could see. Though if you have made bags before this will be easy....not much can go wrong.
 |
| Getting ready to cut out.... |
 |
| Cutting a square for making the bottom of the bag |
 |
| Making a strap to hang keys off... |
 |
| Sewing the outside of the bag....This fabric frays so easily |
 |
| Sewing the lining to the fabric top inside bag.... |
 |
| Lining all ready to insert..and turn. |
 |
| Quality control checking the seams... |
 |
| Inside the bag the key strap ison the left.. I have a wee orange bag hanging off it. |
 |
| All finished... not the best pic wrong time of day! It's a very handy sized bag...thanks Yoshimi. |
Dogs & Ducks
Hmmmm......Why does a dog destroy it's favourite toy? Maybe it is a sign......I'd better go and buy some bones....There are a few pot holes out in the garden too! I've ended up with a dog who is so like my first dog I ever owned, a hole digger. Not to worry she is just a bit bored, and she's only little (in age that is, not size!)
 |
| R.I.P. Duck! |
Frugal Friday
So I thought Frugal Friday would be a good day to do something frugal and dollar saving like making 'Laundry Detergent'. I used to make this because I absolutely hated it when the price of washing powder went up and the boxes kept getting smaller and smaller.
Things You'll need:
A big pot to melt your soap in, Measuring Cups, Wooden Spoon, Jug, Grater, Large plastic bucket with lid.
Bar of Soap, Borax, Washing Soda, Water
Now lets get started, the recipe I use is very basic:
1 bar of soap
1 Cup Washing Soda
1/2 Cup Borax ( I usually use a cup I can't help myself, I think more is better)
 |
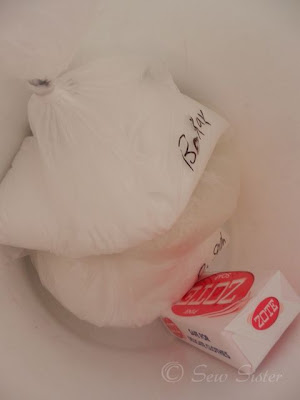
| Gather all the things you might need. This is my laundry detergent stuff, It's only for soap not food. I use an old preserving pan to melt the soap in... |
 |
| Go out and buy your supplies, 1 bar of Soap, Borax and Washing Soda.... don't forget a bucket! |
 |
| Grate up your bar of soap.... |
 |
| Boil a jug of water...I'm not very precise with my measurements use about 1.5L or the whole jug if you want.... |
 |
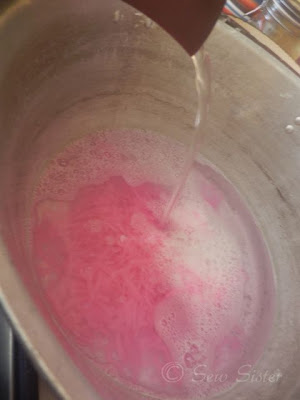
| Put the grated soap into your pot and pour the boiling water over it. Let in simmer away melting the grated soap. Give it a stir occasionally |
 |
| Add 1 cup of Washing Soda to the melted soap and water. Keep it on the heat and stir until it is all dissolved..... |
 |
| Add 1/2 cup of Borax to the melted soap and stir |
 |
| The Borax will start to thicken the detergent stir until dissolved and remove from heat. If you leave it on the heat too long as it goes back to being watery |
 |
| Now pour the soap, water, Borax, and Washing Soda mix into the plastic bucket |
 |
| Then add hot tap water to the bucket... Give it a stir while filling |
 |
| The Laundry Detergent is starting to set now you can use it if you want. It's just a bit messy to handle at this stage... |
 |
| You can see the mix goes all gloppy and slippery, this still isn't set yet |
 |
| Now 24hrs later it has thickened. You can use less soap, 1/2 a bar if you like. To do the washing use 1/2 to1 cup of detergent. Don't be surprised if there are no bubbles it's low suds! |
Labels:
Laundry Detergent,
Resource,
Resources,
Tutorial
Strawberry Lunch Bag
I used the rest of my oil cloth stash to make a little lunch bag...It's kinda cute. If you google ' making a lunch bag" you will find plenty of tutorials out there to chose from. That's what I did, I looked at lots of them and then just used them as a guide...
 |
| The best strawberries I had came out of this pot... well it's a pot within a pot. The strawberries seemed to like it |
Making a Book Bag
I'm making a book bag for school library books. This time I'm using oil cloth because it is waterproof....The blue one I didn't measure at all, I just made it into a size I thought would be okay. All the library books fit nicely into the book bag. It also fits into the school bag just fine.....So I have used the same sizing to make the pink one......
Materials I used: Oil Cloth, Bias Binding, Glue,Velcro, Bulldog Clip, Cotton
Size: 15"length, 13" across, add extra 6 1/2"s for the flap
Sewing Machine: Bernina Activa 220
Sewing Foot: Ordinary straight sewing foot
Tip: Use small pegs or bulldog clips to hold the oil cloth as it is slippery when sewing. Also try and match your cotton to the Velcro your using, then you don't see any wonky Velcro stitches.
 |
| The first bag I made, the fabric is oil cloth... |
 |
I'm using a plate to make the rounded edges,
trace round with a pen or marker of choice...
|
 |
| Cut around the marked edge with scissors |
 |
I'm just checking the size...I made the blue
bag without taking measurements...the pink
one is a fraction larger....
|
 |
| Flatten the folded edge with a plastic ruler |
 |
Sew binding across the top. To hold bag together
use bulldog clips...or pegs. I could only find one...
Better buy some more!
|
 |
| Cut bias ends leaving enough bias to turn under for finishing off |
 |
| Cut Velcro for closures. I made it hard for myself by doing this process at the end when the bag was finished. Best this is sewn on in the beginning before you sew the bias on it makes it easier |
 |
| Because I didn't think I could sew the Velcro on I glued it. But not one to give up easily I did manage to sew it on in the end....not an easy task. It's much better to do it at the beginning |
 |
| To hide the stitches on the front I sewed a piece of bias to the front |
 |
| All finished and ready to use... |
Subscribe to:
Posts (Atom)


